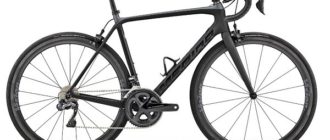
It is very difficult for children 2-3 years old to ride a three- and four-wheeled bicycle and pedal at the same time. Especially since they still have weak legs and not developed movement coordination. The best tool for the development of health of your baby is a pedalless bike – a small children’s bicycle without pedals. It can be ridden by pushing off his feet.
It is not difficult to make a treadmill with your own hands. The main thing is to have a desire, imagination, creativity and a little knowledge about its design. And the golden hands of the master will turn a children’s bicycle into a real work of art, unique and made with love.
Is it possible to make a tricycle by yourself
To make a tricycle by yourself, you need to think about what you will make it from, what parts you will use. It is important to choose the material, the fasteners of parts. Everything will depend on what budget you are counting on and how familiar you are with the simplest operations of sawing, fastening elements.
Sketching a drawing
An important point in the manufacture of a treadmill is to make a sketch, drawing a drawing. Usually a children’s treadmill is made of plywood. Parts have different thickness: 3 mm – the seat, 12 mm – the frame, 24 mm – the steering column. The design is sawn out according to the drawing, assembled, fastened the parts.
material for making
Different types of material are used to make the treadmill:
- metal – it softens the force of impact from potholes and potholes;
- wood – it helps make the construction light and graceful;
- plastic.
Reasons why it is worth making a treadmill with your own hands
The treadmill is sold in any store and on the market. There are various designs, but it is more interesting to make a tricycle with your own hands.
There are several reasons why it is better to make a tricycle with your own hands.
- It is the uniqueness of the design. Imagination and creativity, love for your child – important components when making a treadmill with your own hands. An ordinary treadmill can be turned into a sport bike, which will surprise and cause pride in other children.
- A treadmill costs 5-6 thousand, and for a young family, this amount can significantly hit the budget. Making your own tricycle can help save money.
Components of construction
To make a treadmill with your own hands, it is important to understand its design. For a treadmill you need:
- wheels;
- frame;
- seat;
- handlebar.
Wheels
Wheels are the main parts of the construction. They can be taken from the wheels of an old bicycle, cart or wheelbarrow. Bearings are needed to extend the life of the hub. Their task is to reduce resistance.
Frame
The frame consists of two sidewalls. There is a certain distance between the sidewalls. The sidewalls must match the width of the wheels. The frame is made of 15 mm thick plywood. Bolts, nuts or studs are used to fix the frame.
Seat
The seat is attached to the double frame with furniture corners. It is trimmed with leatherette and reinforced with a stapler. The gasket is made of foam rubber.
Handlebar
The rudder is made in different ways. It can be made from a shovel cutter that is attached with steel clamps. To minimize friction, the shovel is oiled. Instead of a shovel cutter you can use a piece of rebar that is attached with plywood clamps.
How to make a tricycle with your own hands: step by step instructions
To make a treadmill with your own hands, you need to prepare the material: fasteners, material (plywood, for example), components, glue, foam, leatherette.
It is necessary to make a tricycle in a certain sequence:
- plywood is fastened with bolts, so that it does not get loose and delaminate;
- the construction stud fixes the rims of the wheels;
- drill a hole for the nipple;
- the frame and handlebar fork are fastened with a door hinge;
- as fasteners of the seat with a seatpost, confirmats (Euro screws) are used;
- the foam is fixed on the seat;
- paint the finished product.
Conclusion
Jegging bike with their own hands will save money, will improve the health of the child. Your child will be proud of the device made by Dad and not like other bikes.


