A bicycle first aid kit is something every cyclist should be familiar with. Especially if cycling becomes an integral part of the daily routine. It is also necessary for long rides over long distances.
No one is immune to accidents on the road. During any ride, an unpleasant situation can occur that will mar the entire journey. For example, abrasions and bruises after an accidental fall from a bike or a puncture in the wheel kilometers from home. This is where the bicycle first aid kit comes in handy.
The term “bicycle first aid kit” can have two interpretations:
- A set of medicines for the victim.
- A set of tools for fixing a bicycle on the road.
This article discusses both meanings of the term “bicycle first aid kit,” as well as their composition and instructions for use.
What is a first aid kit

Bicycle first aid kit is a set of tools for immediate repair of bicycle parts. It will become an indispensable aid in fixing a puncture and will save you from a long search for the nearest transport.
Medical bicycle first aid kit – a set of medicines for first aid to an injured person. Bicycle first aid kit is similar to the kit needed by the motorist on the road. The use of such bicycle first aid kits saves lives in many accidents.
Before figuring out how to use a bicycle first aid kit, find out what the term in question is. It can be understood in different ways, and because of this, many people get confused in conversation and have a complete misunderstanding in the process of communication.
For example, your friend said that he took a bicycle first aid kit, and you responded by suggesting that you can ride without fear of off-road at a great distance from the nearest town. And in case of a punctured tire you are not too worried, because your friend has patches. But no, he does not have patches, but he has bandages and iodine.
What a bicycle first aid kit should look like

Before buying any first aid kit, in addition to its contents, it is necessary to pay attention to its appearance. Since it is a first aid kit, it must be as simple and easy to use as possible.
The main parameters of appearance for a bicycle first aid kit:
- Lightweight and compact. Will use the first aid kit on the road, and therefore carry it with you all the time, placing it in the backpack or mounted on a bicycle. In order for it did not become crippling burden, its weight and volume should be minimal. This is especially important for long trips when the backpack is already stacked with a lot of things.
- Waterproof or airtight bag. This feature is not necessary for a car first aid kit, since it is transported in the trunk and has no contact with water. For the bicycle first aid kit this is very relevant. On trips on the bike it can get wet and its contents become unusable.
- Colorful. Catchy color is needed to make it easier to find in emergency situations. It is better to buy the material in red, then you will find it among the things faster. Also a bright color will make it easier for strangers, who have no idea about its location in your backpack, to find the first aid kit. Stow it last so it’s on top.
If your first aid kit contains medicines in glass containers, it is advisable to replace them with plastic ones to avoid possible damage.
Kit of the first aid kit

The instructions for assembling such a necessary thing as a medical first aid kit are quite simple.
Obviously, for long journeys, the contents of the bicycle first aid kit will be more extensive. If you can use the nearest vehicle to get home with your bike, you do not need a complete kit.
Two options for purchasing a bike first aid kit:
- Assemble it yourself.
- Buy ready-made, which is relatively easier. It’s better to buy it together with your bike.
Since the main damage on the road comes to the wheel, the kit has all the tools you need to repair your tubes:
- Spare tube (2 pieces) to replace a damaged one. In this case, you will not need patches and glue.
- A bicycle pump to inflate the wheel. You can buy a road version and attach it to your bike frame to save space.
- A universal wrench to loosen and tighten any bolt or hexagon.
Tools needed to repair a damaged inner tube:
- Patches to patch up a puncture site. Differentiated by the way they are used into classic and self-adhesive. The second version will not require glue.
- Glue to stick the patches to the puncture site. It is best to use 15cc glue of the brand “Sycledesign”.
- Sandpaper or wipes to clean and treat the surface.
Tools for repairing a bicycle chain:
- A chain extractor for removing torn links and then replacing them with new ones. This tool won’t take up much space.
- Spoke wrench for fixing a figure eight wheel or restoring spoke extension.
You may also find plastic spatulas, nipple gum, harnesses or blister kits.
Before replacing or repairing parts yourself, check out the videos that provide a visual look at the tool kit with comments on its use.
The contents of the first aid kit depend on two factors:
- The presence of individual illnesses.
- The distance to be ridden.
When assembling a medical bicycle first aid kit, it is important to consider the personal peculiarities of the body. For example, individual intolerances or possible allergic reactions. Medicines that will cope with such ailments should go in the first aid kit. As well as those medications that the cyclist needs to use regularly.
The distance of the ride will affect the size of the first aid kit. If the trip is planned within the city where there are pharmacies, some medicines should not be taken with you, they will be easier to buy. Remember that any medication weighs down your backpack and adds to its volume.
Medical kit, depending on the distance of the trip are of three types:
- For trips within the city.
- For short trips out of town.
- For long bike trips.
For intra-city commuting.
Since there are pharmacies in the city and the necessary medicine can be purchased there, the set of medical kit will contain only those medicines that may be needed in an emergency. That is, in cases when there is no time to look for the nearest pharmacy.
Contents of the first aid kit:
- Bandage kit;
- sterile bandage;
- tourniquet;
- ammonia;
- hydrogen peroxide;
- green or iodine.
Such a kit is enough to provide first aid. Also add to it individual medicines for regular use.
Short trips out of town
For these trips, increase the number of bandages and plasters, and add the following:
- Cotton swabs and wet wipes;
- alcohol solution;
- painkillers (e.g., analgin);
- Sorbents.
Use a first aid kit with this kit for pain relief. Use the contents of the first aid kit to get to a medical facility if necessary.
Long bike rides.
When collecting such a first-aid kit should be taken into account that it will have to be used in cases where medical care in the village will be provided to the victim after a long time. Therefore, such a first-aid kit should contain everything that may be needed in road accidents.
Usually, a group of several people goes on long trips. Therefore, for convenience, the contents of the first aid kit are shared between all the participants of the ride. In addition, each cyclist has his own individual first aid kit with the same set as for city trips.
Contents of the group first aid kit:
- Extra bandages and band-aids (up to 8 packs);
- scissors;
- thermal tape;
- Vaseline (for healing skin wounds)
- warming ointment;
- antibiotics;
- anti-diarrheal medication;
- eye drops;
- nitroglycerin (to relax muscles);
- a cramp reliever (e.g., No-Spa or Mig).
Given the weather conditions, add cold medicine or cream to prevent sunburn.
How to use the bike kit
To understand how to use the first aid kit to fix your bike, refer to the following procedure:
- Identify the part that needs fixing, such as the chain, wheel, or frame.
- Choose the right tool for the job.
- Reanimate your iron friend.
The most common cases that require repair:
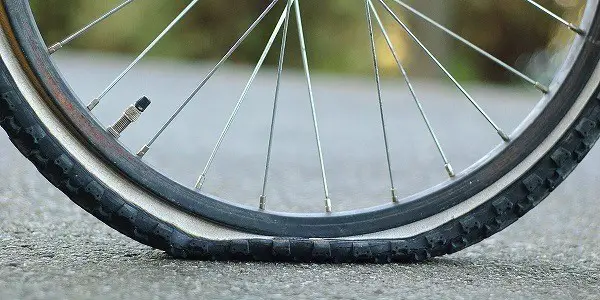
- Punctured wheel.
If the camera is damaged, replace it with a new one or put in a patch. To do this:
- Remove the tube.
- Locate the puncture site. You can do this by putting the inner tube in water. Air bubbles will appear at the puncture point.
- Roughen the puncture point with a sandpaper.
- Apply the patch. If it is not self-adhesive, use glue.
- Inflate the tube and put it back on the rim under the tire.
- Unscrew the bolts. Use the Allen wrench to tighten them back up.
- The chain is loose or torn. Put it back on, and if necessary, remove the broken links with a squeegee.
Conclusion
A bike first aid kit is essential on the road for medical attention or to fix your bike. The instructions for its use are quite simple. It is about health and safety, so you should not neglect it. The first aid kit can help not only you, but also the people around you.


