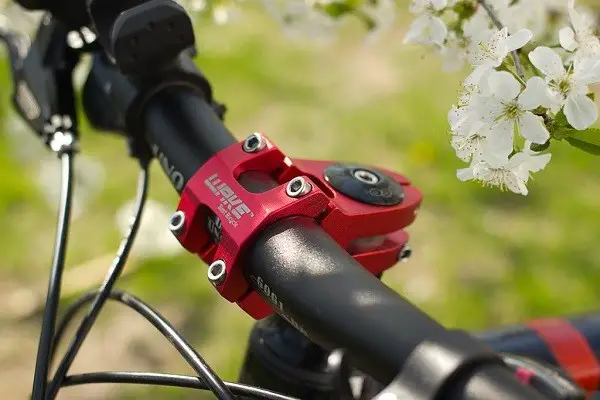
The handlebar stem for bicycles (the so-called handlebar bracket) is rightly considered the most important element that connects the vertical handlebar pin to the handlebar. And since it is given such importance, you should not skimp on this part when choosing.
Design

The steering column “dictates” the peculiarities of the design of the handlebar stem for the bicycle:
- If the column is unthreaded, the holder is put on the fork stem, as it does not have a vertical pin. The advantage is a simpler and lighter design, the disadvantage is that it is more difficult to adjust the height;
- if the column is threaded, the holder is integrated with a pin that is inserted into the fork stem. Advantage – you can easily adjust the height, disadvantage – more complex and heavy in weight construction.
Any kind of bike has a bike stem, but depending on the variety, its characteristics may differ. For example, for road bikes, a long handlebar stem is best, which will ensure proper riding position. As a consequence, air resistance will be reduced during high-speed movement on the track. Stable trajectory is important here, but the fact that the response of the handlebar will be somewhat sluggish – this does not pay much attention.
For mountain bikes, the handlebar stem is better to choose a shorter – this will contribute to a straight landing of the rider, more responsive turns of the steering wheel and better maneuverability of the bike. For mountain biking it’s not so much about speed as it is about control, so a long handlebar stem is not suitable for mountain bikes.
Brackets of medium length allow you to use the advantages of both types, and as a result you can adjust to the terrain and the peculiarities of riding, combining both dynamics and safety.
If your bike does not have a specific purpose, a universal handlebar grip is best.
Types of Bike Stems
There are three types of outriggers based on how they attach to the handlebar:
- bracket with 1 mounting bolt;
- fixed with 2 bolts;
- fixed with 4 bolts (screwed one by one diagonally).
There are short, medium, long, and universal stem extensions; they may or may not be adjustable (the rider can adjust the steering to himself). Of course, the advantage is for those models that allow you to adjust the location of the handles, which will increase the comfort and safety of the cyclist while riding.
Dimensions
A bicycle handlebar can be up to 14cm long, but the most common handlebar size ranges from 4cm to 10cm.
- Usually on city bikes installed short stem 20-50 mm – for such bikes are primarily important good visibility for the cyclist, and therefore its high landing, which is ensured by a short holder. The shortest ones are mounted for maneuverability and increased durability on downhill bikes and BMX bikes. It is ideal for frequent and steep descents.
- The universal handlebar brackets are 60-90mm long.
- Mid-sized stems of 100-110mm are used for good handling on mountain bikes.
- Longer mounts, used mainly on track bikes, are 12-14cm – good for taller riders, for long rides on flat pavement, and for long Uphill—how-to-learn–tips climbs.
In addition to length, the diameter of the holder is especially important:
- on sitibikes and BMX bikes the parts with a diameter of 2.54 cm;
- on road bikes it’s 2.6cm in diameter;
- for MTB – 3,18 cm;
- For track bikes the suitable diameter is 3.5 cm, but it’s quite rare.
How the size of the stem (its length) influences the controllability of the bike

The length of the holder has the greatest impact on its handling and the rider’s riding position. Trying to figure out how to choose the handlebar stem for your needs, it is important to understand this point: the larger the size of the holder, the further you have to stretch to the handlebar grips.
A short handlebar stem improves bike maneuverability. This design puts the handlebar close to the rider’s body, which makes it easier for him to make turns and increases the bike’s durability.
A long handlebar bracket removes the handlebar from the seat, so the rider sits more horizontally and has more difficulty making turns, but it improves aerodynamics and speed.
There are also modifications that allow you to change the angle of the handlebar.
It is also possible to find models that have no stem at all. The handlebar is connected by welding to the handlebar pin. Such a rigid connection makes it difficult to select the right fit for the rider, if the height is adjustable at all.
How to Set the Bracket Length
Given that bicycle handlebar stem can be different lengths: from their complete absence to 14 cm, there is an algorithm on how to measure the handlebar stem of a bicycle:
- Set the seat as comfortable as you feel it should be;
- touch the edge of the nose of the seat with your elbow;
- If you can reach your fingers to the handlebar, you have found your optimal stem length;
- if you ride in the city, put the handlebar a little closer to the axle to sit upright in the saddle;
- on long rides, it is worth to move the handlebar a little further away to give the body a more horizontal position. It is easy to measure the right position: Your fingertips can reach the middle of the mount.
Warning. The average distance of the handlebar in relation to the steering axle is 10-12 cm. If you feel uncomfortable with any mounting option, it is likely that the bike frame is too small, look for a more suitable option.
Long handlebar overhang leads to a shift of the body forward, which increases the load on the front wheel and hands. This is worth considering if you will be riding a lot on a slope. It will be hard for you in such position. But if, on the contrary, frequent rises Uphill—how-to-learn–tips, this length will facilitate the ride.
Materials of construction
Frames and bicycle stems are made of the same materials:
- Steel bike carriers are sturdy but heavy, usually installed on inexpensive sitibikes, mountain bikes and BMXs;
- aluminum alloys have proven to be strong enough to make the bike lightweight, and are most commonly used on road bikes, MTBs and city bikes;
- chromium-molybdenum – due to its high durability are installed on quality bimixes and extreme bikes;
- carbon fiber – highly durable and super lightweight material used on high-end mountain bikes and road bikes;
- Titanium – despite its strength and lightness is rarely used.
Methods of making stems, as well as the materials from which they are made, have several options:
- Forged brackets are the most ideal option. They are strong and lightweight with a long lifespan. They only have one drawback – they are the most expensive.
- Aluminum tilt-milled outriggers have the most weight, but they are also the most reliable – perfectly able to withstand increased loads on the handlebars.
- Welded mounts are often installed on budget models. These parts are easier to produce, that is why they are the cheapest and have the widest range of sizes. However, welded bends are often not of high quality due to the seams, which may lead to cracks near the handlebar stem.
- Mixed production technique is attractive due to its low price and good quality of the product. In this case the handlebar clamp is welded and the fork rod clamp is located in the body of the holder.
Handlebar stem removal and replacement
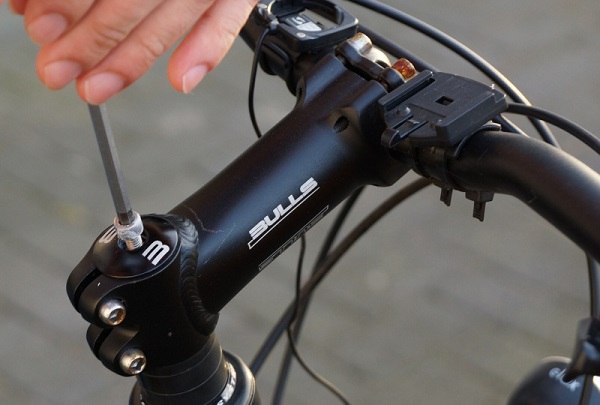
Of course, nothing lasts forever, and one day any part might break. Even if it doesn’t break, any defects mean you have to replace it. The bracket welded to the fork stem should also be replaced. If the bike stem was bolted down, it’s easy to replace – you just have to unscrew the bolts.
To remove the holder, unscrew the center nut and remove the pin from the fork tube.
By loosening the bolts, you can adjust the angle of the part, and then the bolts are tightened firmly. Similarly, the length is also adjusted. It is likely that you will make length and angle adjustments more than once, trying to choose the right position for you, so do not be afraid to adjust the bike until you are completely satisfied with its parameters.
And another such nuance: adjustable handlebar stem is necessary for bicycles for sprint and MTB, but if you’re going to use a recreational or sitibike, in an adjustable holder is not necessary. So don’t overpay, buy yourself a vehicle with a non-adjustable bracket.
Conclusion
Bike handlebar stem – a detail of small size, but of great importance in the entire design of the bicycle. When choosing it, you should consider many parameters: the material and method of manufacture, length and diameter, as well as the cyclist’s riding style and the terrain where the bike will be used. The main indicator of a properly chosen bracket is the rider’s comfort. Carefully choose a bike stem, and then riding your bike will bring you pleasure and save you a lot of trouble on the road.


