Bicycles travel long distances and it is therefore important to be sure that your vehicle is in good technical condition when you set out. Accessories can increase the level of comfort when riding a bike. For secure attachment of the elements of the upgrade are best suited bike mounts. Why we need bonnets and how they are used, let’s try to understand in this article.
Bonnets – the concept and purpose
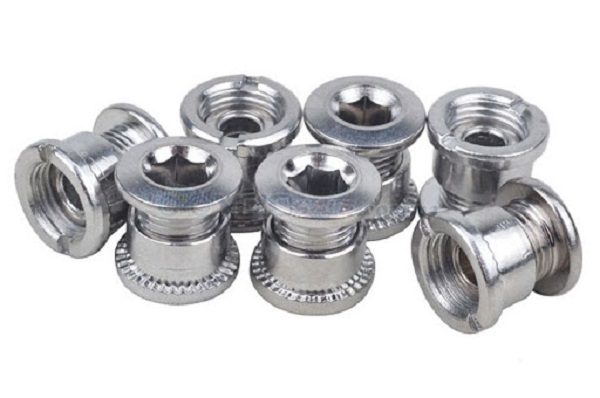
Bonnuts for bicycles are hollow on the inside of the nuts and bolts of a special purpose. Another name for them is threaded nuts or rivets. They are also used to produce threads on thin-walled parts. Bicycles are not the only area of their use, but if we discuss it as an example, bonnets attach the drive sprockets to the spider on the connecting rod. They are used on structures made of metal, plastic and other materials.
In addition to the use described above, couplings are also suitable for fixing parts with a hollow profile. The list includes components of this type such as pipes, casings, barrels and others. The main reason for using couplers is the mounting method without the need for access from the opposite side.
Features
The use of the sides ensures the smoothness of the surface of the fastened material due to their complete immersion. Retaining nuts are used when the riveting load is limited. The installation of the sides does not require special skills or complicated equipment. Even a beginner can perform their installation. Installation involves sequential attachment of parts and making an internal threaded channel.
The main advantages of rivets should include:
- resistance to stresses;
- “blind” installation, with access from one side;
- riveting and threading capability;
- thermal shock resistance;
- ease of use;
- low cost.
Variety of parts
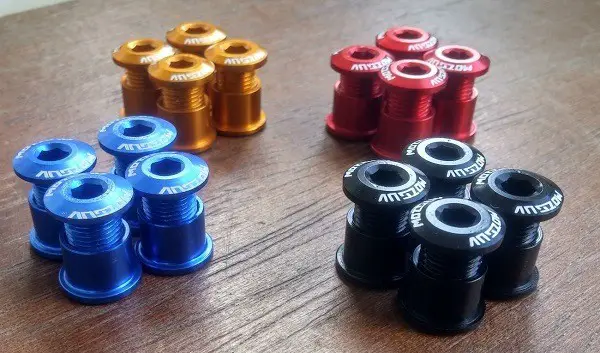
Bicycle couplings vary in size and appearance. In most cases, threaded nuts are made of stainless or galvanized steel, as well as aluminum.
In terms of size, parts are divided into the following main groups:
- small – 4-6 mm;
- medium – 6,3-10 mm;
- large – from 10 mm.
If necessary, it is possible to pick up coupons by color. On sale there are gold-yellow, red, blue or black parts. With such a variety, it is not difficult to find a suitable solution for any bike.
Depending on these parameters, the bonnets can have different prices.
Instructions for installing rivets
Installing a threaded nut does not take much time. In addition, you do not need special skills or tools to perform the installation. A slotted nut is enough, but for the bolt, a hexagon or star will come in handy. You may also need a special wrench if you have to install the sides on two ends at once. An inexpensive model that will hold the spur on the inner sprocket while you tighten or loosen it with a wrench will do.
The installation process is done in two steps:
- A coupling is made to hold the sprocket.
- A threaded channel is created.
This preserves the plating on the bicycle, which means there will be no corrosion at the mounting location. The riveting tool has a threaded spindle, it can be unscrewed and replaced. After the nut is placed in the product, the spindle is screwed into it and when it is retracted, it is deposited. Eventually the spindle is left to be removed from the nut and the installation is complete.
Conclusion
Bonnets are indispensable when restoring the functioning of a bicycle system. Their breakage can cause problems in shifting speeds and even deformation of the sprockets. To keep your bike in good working order, you need to have it inspected and serviced periodically. Be sure to choose quality parts and install them in a timely manner.


Thanks for writing this post! I never knew there were so many different types of bicycle couplers available — it’s really helpful to learn about them and the installation process. It would have been even more useful if you had included a diagram or two showing how these couplers are installed.