Scratches, chips, cracks and loose paint are the consequences of intensive use of the two-wheeler. The imperfections are visible to the naked eye and often destroy the metal mercilessly. In this case, you urgently need to paint the bike, which will protect and quickly update the design without excessive financial cost. Otherwise, repairs will cost more and take a long time. Recommendations will help you learn how to paint a bicycle to return an old transportation vehicle to its former gloss.
Painting your bike frame
The first to signal the need for urgent painting is the bike frame. If the main supporting structure has many scratches, peeling paint, accumulated rust, it’s time to prepare a plan of action and eliminate defects. Unpleasant symptoms should not be perceived only as an aesthetic component. Chips and corrosion on metal tubes and plates reduce the life of the bike by an order of magnitude. Even if you’re just fed up with the color, the frame will require:
- More paint than the other components of the bike (3 cans or 0.5L of spray paint);
- the use of duct tape to protect parts not to be painted.
- grit paper (the grit size of the sandpaper is adjusted to the depth of scratches, cracks);
- thick consistency of primer;
- degreasing solution.
Before you paint the frame of a bicycle, select a color scheme and design, on which depends on the appearance of the vehicle. The preparatory stage contains 5 steps:
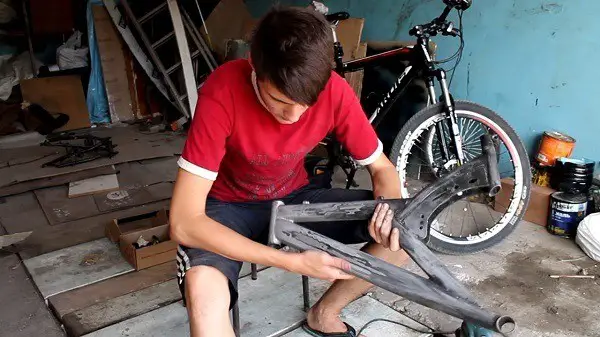
- Disassemble the parts (dismantle the handlebars, fenders, wheels, chain, cranks, trunk). Make a diagram in order to further correctly install the mechanisms in place.
- Free the frame from the old layer of paint. Stickers are easily removed with hot water, changing the structure of the glue.
- Clean off any rust and smooth out any irregularities with abrasives.
- Degrease and prime the surface. The operation is carried out so that the paint does not flake and evenly cover the frame. Leave the solvent on the surface, then go over it with a clean cloth.
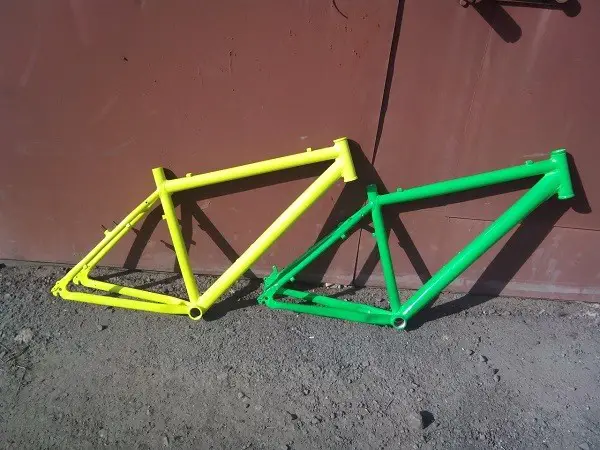
- Move on to the most difficult process – painting. Of great importance is the amount of paint, which should be applied gradually to avoid drips. If there is a surplus, the construction is tilted in the opposite direction from the leak.
Using a spray can.
To paint the frame, paint cans are often used. Powder or liquid formulations are sprayed on the surface in a thin layer without a brush. Once dry, a hardened protective film forms on the frame. It is difficult for the cyclist to choose the right paint because of the large number of markings. Unsuitable compound shines immediately after application, but scratches easily after a month, even from a small blow. The sprayer is held at a distance of 10-15 cm. The paint is applied in three layers. Each coat is allowed to dry before applying the next layer. A fully painted frame dries in 2 days. It is recommended to use acrylic paints to paint the bicycle with the sprayer at home.
Powder coating
This type of smooth coating is considered the strongest and most durable, but requires special equipment in an industrial environment. Professionals at the question of how to paint a bicycle with powder paint yourself, it is advised not to experiment, and go to a workshop. It will take much less money and effort.
The choice of paint
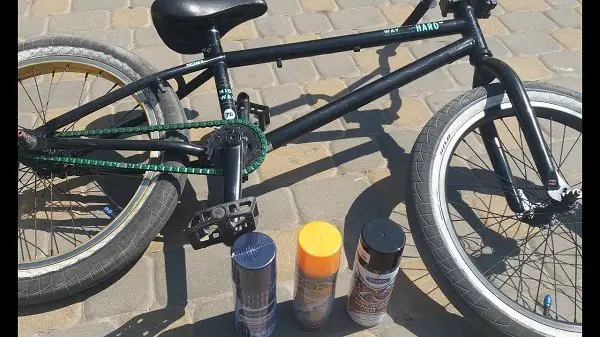
Manufacturers have taken care that cyclists have no problems in choosing a paint for their two-wheeled transport. What color the bike will be – the owner decides. Manufacturers are responsible for the quality of the paint material. On sale are cans of ready-made acrylic paint. Specialized stores offer an expensive exclusive coating, which is applied using a compressor or spray gun. For quality painting, varnish with hardener is used.
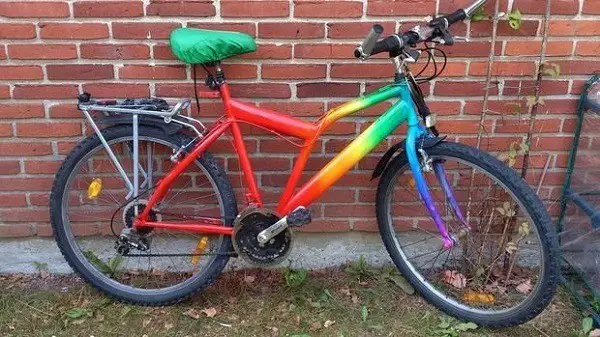
Fashionable trend has become drawing drawings, characters, lettering on a bicycle frame with the help of scotch stencils. Stenciled details are carefully sprayed so that the paint does not flow beyond the contours. Many cyclists use reflective paints and highlight the frame with bright hues of color. To avoid a negative chemical reaction, it is recommended to use paint from the same manufacturer.
Painting Tools and Supplies
The choice of tools and chemicals depends on the type of bike, the volume, complexity of the work. Each stage of bike preparation and painting requires its own tools, chemical compositions, paint materials. Before painting your bike frame, it is recommended that you consult with painters or service station workers who understand the nuances of metal compatibility with paints, varnishes, and washes. Incorrect choices on your own can be detrimental to the design.
| Paint kit | Using | Features |
|---|---|---|
| Keys Flat or Phillips screwdriver |
Dismantle the parts on the vehicle | Hexagon set, spoke wrench needed |
| Abrasive material | Removing rust from metal surfaces Removal of small defects, chips |
Selection of sandpaper depends on the depth of scratches, cracks Grit size P80, 220, 320 |
| Scrubbing
BODY 700 ABRO |
Removes layers of old paint and coatings from surfaces
Effective clear liquid Aerosol cleaner |
Chemicals harmful to metal The product is compatible with stainless steel, aluminum, plastic, chrome Fast-acting remover for removing old paint |
| Degreasing agent | Acetone White spirit |
Destroy grease deposits that interfere with even distribution of the paint |
| Spatula
Brush |
Trowel-shaped tool made of steel, plastic Choose flat-shaped object made of natural bristles |
Applying flush, primer Cleaning the surface Remove stickers, drawings |
| Primer | Select a compound that is resistant to high humidity | Paint flakes and falls off without a bonding layer |
| Spray gun for different paints | Pneumatic gun | If using a spray paint |
| Construction tape | Adhesive plastic or paper tape | Used for sealing parts that are not to be painted |
| Respirator | Personal protective equipment | Protects the respiratory system from harmful aerosols |
| Wire (rope) | Used to hang the frame | Drying 2 days Do not use your hands to check for drying |
Step by step instructions for painting your bike at home
Old two-wheeler will shine like new and will remain a reliable technique for a long time, if properly prepared and comply with the recommendations for self-painting bike. The entire process consists of four steps:
- preparation;
- dismantling;
- sanding;
- painting.
A bicycle upgrade can double the life of a bike.
Preparing
The first stage consists of selecting a design, acquiring the necessary materials, tools, personal protective equipment. The workplace is equipped in a ventilated room and covered with a film. Before painting a bicycle with a spray can, carry out the following actions:
- Remove all canopies, which will not be painted.
- Dismantle the wheels, fenders, trunk.
- Unscrew the handlebar from the fork.
- Seal open threaded areas with tape.
- If you decide to paint your bike in several shades, tape over the individual sections. In these cases, painting is carried out gradually in layers.
- Prepare in advance stencils for the application of logos, drawings, inscriptions, etc.
- Recorded on a video algorithm of actions, so that then properly install the details in place.
Removing the old paint
No matter what color is chosen, the coating will not lay evenly without removing the old layer. A clean rag is soaked in paint remover, and the parts are carefully treated, paying attention to the welds. After 15 minutes of degreasing the surface, remove the old paint with a scraper. Stickers are easily removed with hot water, which changes the structure of the adhesive. To remove chips, scratches, the surface is cleaned of corrosion and the irregularities are smoothed out with sandpaper. If streaks are left on the bike, the procedure is repeated again. Removing old paint with coarse abrasive paper speeds up the job. Fine sandpaper helps you achieve a perfect finish when applying paint.
Primer Application
There is a perception that primer is not a necessary component for the home bicycle paint method. However, applying a prep coat helps to spread the paint evenly and protect it from further flaking and defects. Primer is sold in dry and liquid form. When properly diluted, you get a mass that flows smoothly from the brush. Thickened material is diluted with solvent. The primer is applied as follows:
- The product is applied in a thin layer to the frame and cleaned parts;
- Leave to dry for 20 minutes;
- Priming repeat 2-3 times;
- After a day, gently remove the thickening with an emery cloth.
A pneumatic gun is used for quality priming.
Varnishing
In the process of use, bicycles lose their attractive appearance. Scratches and rust appear on metal structures, the paint cracks and falls off. To protect the painted surface, to give a shine to the frame, a special varnish is used. Aerosol is applied directly to the dried paint in 2-3 layers at a distance of 10 cm. Each layer is sprayed after 15-30 minutes of drying. The product fills small cracks and inhibits corrosion. It is easy to take care of the strong and durable coating. It is enough to wipe the surface with a damp cloth. Decorative elements are applied before lacquering with matte paints.
Recommendations for painting wheels and trunks
Bicycle transport gets an updated look after a beautiful painting of the rim of the wheels and trunk. Sequence of work:
- Remove wheels and trunk;
- remove the tires;
- wash off the dirt and dry the structural elements;
- clean up scratches, cracks, chips;
- clean the old paint with an abrasive material;
- degrease;
- cover the edges of the spokes with scotch tape;
- Apply two coats of primer to suspended parts;
- Paint in three rounds with a spray can.
Can you paint a bicycle without disassembly?
A simple variant of painting two-wheeled transport is used when there is no time to disassemble the parts. The method is often used to update a children’s bicycle. The main features:
- A large amount of tape will be required to protect the elements of construction that will not be painted (feathers, gaps, brake cables, chains, etc.).
- The primer is applied to the suspended bike.
- After it has dried, paint is sprayed on.
- Use a soft paintbrush to get the problem areas cleaned.
If there is rust on the surface, it is not possible to paint the bicycle with the can without disassembly.
Conclusion
It is possible to resurrect a bicycle with your own hands. Painting a personal vehicle does not require any special knowledge. It is enough to properly clean and prime the surface, apply paint in the best way – using a spray can.


This is a great post! So many of us have old bikes that could use some sprucing up. Thanks for providing detailed instructions on how to paint a bicycle at home — this will definitely come in handy!